First timer’s guide to FOSS conferences

AdaCamp Model Release Agreers

I’ve been going to FOSS conferences since 2006. My first open source conference was FreedomHEC in Seattle, a little 30-person conference for Linux users to protest Microsoft’s WinHEC. My next open source conference was OSCON, which had over a thousand attendees. They were both very different conferences, and as a college student, I really didn’t know what to expect. Going to your first open source conference can be intimidating, so I’ve complied ten tips for people who are new to the conference circuit.

Rule #1: The Hallway Track Matters Most

Conference talks are great because they teach you new skills or give you ideas. However, what conference talks are really for is giving you additional topics of conversation to chat with your fellow conference goers with. Hanging out after a talk ends to chat with the speaker is a great way to connect with speakers or fellow attendees that are passionate about a particular subject.

Why do I downplay conference talks? Because it’s really the networking at a conference that matters. The “hallway track” is where you’ll talk to fellow open source contributors, find your next job, or get excited about a new project. If you were only here for the talks, you would save yourself the travel expenses and sit in bed watching the livestream of the talks. So your first focus should be on the people at the conference.

There’s a lot of ways to maximize the networking you do. One small trick is to make sure you have a pen and physical paper cards. Moo cards are great, because you can add pictures to the front of the card. Maybe you want to add a picture of your latest circuit layout. Or travel pictures, so you can have an additional conversation starter. However, I would avoid putting a picture of yourself in a business suit on the front. I’ve seen one card that used that trick, and while it was great for identifying the person I talked to, it felt really pretentious.

When you receive someone’s business card, write down the reason you need to get a hold of them on the card, and any identifying information you need to remember who they are. You’ll thank yourself two weeks later when you recover from con fatigue and find a stack of forgotten business cards. I’ve tried using digital barcodes on my phone to redirect people to a business card page on my blog, but it takes too long for people to fiddle with their phones and it feels really awkward. Paper cards are old school, but they work best. I’ve also seen some hardware hackers print circuit board business cards. Those are really neat and memorable, but cost more and don’t allow people to write on them.

To optimize your networking, follow the one to many rule. If you mostly hang out with groups of people you know, you won’t end up making many new contacts. What you really want to find is a group of people that has one or two people you know, who can introduce you around. If you’re already in a group, face your body slightly outwards and a bit away from the person next to you, leaving the group open to new members.

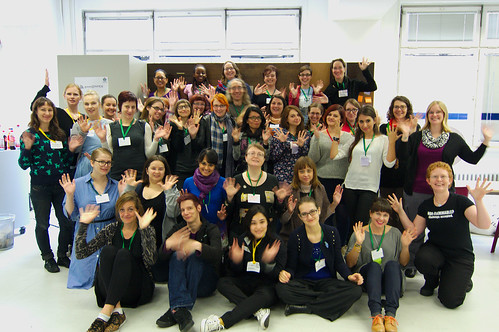
If you don’t know anyone, you can stand around the coffee/snack/water table and drink/eat while you see if there are interesting conversations you can insert yourself into. Moving into a group of chairs and asking someone nearby if the chair is taken can be a good way to try and start a conversation about how the conference is going. If you find out someone is a speaker, you have an automatic topic of conversation later when you ask them how their talk went. Approaching a stranger with the question, “I love that sticker on your laptop, where did you get it?” is always a good way to get someone to talk about something they’re passionate about.

Rule #2: It’s OK to Skip a Session

Maybe you’re having an awesome conversation. Maybe you skipped lunch and you desperately need food. Or you’re speaking later in the day and you want to go over your slides one more time. It’s fine to skip a session. I promise you won’t miss out on much.

Rule #3: Triple Conflict Sessions Are Common

Conference schedules are a feast or famine affair. There’s usually at least two sessions where I’m not interested in any of the talks, and two more sessions where there are three talks I want to attend. Scheduling is the bane of conference organizer’s existence (it’s an NP complete problem!) so cut them some slack.

When I am triple booked, I’ll go to the talk on a subject I’m least familiar about. Conferences are a place to learn, and a place to network with experts, so it’s better to go to a talk on a new topic you’re interested in. The only exception I make with this rule is if the triple booked session is in the late afternoon. At that point, my brain is full of new knowledge, and it’s better if I watch the new topic talk as a video later.

Rule #4: Care and Feeding of Introverts

Most conferences start around 9am or 10am, include a break for lunch (either provided by the conference, or on your own at local restaurants), continue until 5pm or 6pm, and then have evening events from 7pm until around 10pm or 11pm. A lot of conference goers then go drink and chat until the wee hours of the morning.

I know a lot of geeks who don’t attend big parties at home, but get all their socialization in during the conference season. It can be exhausting as an introvert to attend a conference. It’s not just that there’s a whole lot of people, it’s that there’s a whole lot of strangers, and that can trigger social anxiety.

If you’re an introvert (like me), there’s a couple of different ways you can take care of yourself. Personally, my social batteries get pretty low around mid-afternoon. If I don’t recharge, I know I’ll be a untalkative zombie during the evening social events. Every day, when I’m planning out my conference schedule, I deliberately pick one uninteresting afternoon session to go back to my hotel room and take a nap. If my hotel room is too far, I carry a headband to cover my eyes and unabashedly take a nap on a conference bench. Those naps have seriously saved my life.

Evening events are always a game of chance for me. As an introvert, the best evening events for me are ones that center around an activity. Some of my favorite evening events at conferences have been bowling, wandering around a museum, playing arcade games and DDR, going for a boat ride, and playing board games. My least favorite conference evening events are the booze-filled bar crawls. When my anxiety at being crushed in a giant crowd of strangers is coupled with a throng of drunk dude-bros that are shouting at each other over the loud music, I last about an hour before I flee. It’s perfectly fine to retreat back to your hotel room. It’s also acceptable to find fun people to flee with, or even arrange to meet said fun people elsewhere and avoid the crowds.

Rule #5: Care and Feeding. Period.

When I first started going to conference, I wanted to see all the talks, talk to all the people, and do all the events. However, a lot of conferences don’t allow enough time at lunch to get food from restaurants. If you want to make the sessions before and after lunch, that typically means eating some crappy food at the convention center, and rushing off without talking to people. Rule #1 applies, so what you really want to do is be at peace with coming late into the afternoon talks, and wander off with some interesting people to chat over a leisurely, healthier lunch.

I’m not going to lie, a lot of people at conferences drink at evening events. Some of them don’t, and honestly, some of the most fun I’ve had has been hanging out and bonding with other non-drinkers. Many geeks don’t drink all that much at home, but tend to throw back A LOT of drinks when they’re paid for out of some start up or big company’s budget instead of their own pocket. If you don’t feel comfortable in that situation, make sure you come with a buddy or another non-drinker.

If you do drink, take care of yourself. Drink water, take some vitamins, and have a plan for getting back to your hotel in a foreign city. Due to past experience with the morning after impacts of heavy drinking, I always pack an extra pair of jeans. They add weight to your suitcase, but having an additional pair of pants is better than washing vomit out of your only pair of pants and then ironing them dry before you rush off to your flight. Did I mention I don’t drink much any more?

The morning after evening events are brutal. Not gonna lie, I’ve never made breakfast plans at a conference. I do often find people to eat with in the hotel breakfast buffet, but I never make firm plans because I don’t know how long I need to sleep. Sometimes I skip the hotel breakfast and just head straight to the conference. On those days, I’m really glad I packed myself breakfast bars.

Basically, you need to be a soccer mom to yourself. Pack yourself a water bottle and food, and maybe some fruit snacks and animal crackers. 😉

Rule #6: Trust the Whisper Network

Conferences are full of people who are interesting, and occasionally house people who are known harassers. As a newcomer to a conference, you’re likely to be targeted because you don’t know who those harassers are. Trust your gut if something feels off. Recognize when someone is trying to isolate you, test your boundaries, or ply you with alcohol. Know whether your conference has a Code of Conduct, and program in the email or phone number of the CoC contact into your phone, along with the local police non-emergency numbers. Figure out how to identify conference organizers, and make friends with minorities and women who have been to the conference in the past. It’s likely they will know who you should avoid, even if they can’t publicly talk about it because they might get sued for libel.

Rule #7: Know Your Conference Perks

Did you know that most conferences have a travel budget? That’s right, if you’re a speaker or a student or a member of an underrepresented group in open source, you may be able to get your conference travel paid for. Organizers will usually pay for conference fees, sometimes pay for airfare (it may be harder to get them to pay for international travel), and may pay for hotel and hood. If you’re a well-recognized speaker who has been invited to give a talk or keynote, organizers may also pay you a stipend (the amount of which is usually negotiable).

Some (but not many) conferences have consuites where any attendee can get free food. Others provide lunch. Some conferences have evening events with free food. If you’re a speaker, find the speaker’s lounge, which usually has coffee and cookies and other interesting speakers to talk to.

Rule #8: Swag is a Double-edged Sword

Do you really need another beer bottle opener? Are you willing to lug home a dozen t-shirts that don’t fit? When someone asks what that sticker is on your laptop, will you lose geek cred because you slapped some company’s brand on your property without actually using their product?

The downside of all that free stuff is that it’s actually a ploy to provide companies with your contact information. A new trick for conferences is to include a bar code on the badge with your personal information on it. Booth wranglers will scan your badge, and do whatever they want with that information. Give it to recruiters, sign you up for their email lists, or even give that information to third parties. Do you know what’s on your badge bar code? Could a stalker glean information like your phone number and zip code from it? You can always choose to take a pen to the bar code, and booth people should still give you all the freebies and manually sign you up for entry into any giveaways.

Rule #9: Follow up

You’ve met a bunch of awesome people, gathered a stack of business cards, and gotten in contact with recruiters at a fascinating new company. After the conference is over, it’s time to follow up. It’s best to wait at least a couple days, so that people traveling can get back home and start shoveling through their overflowing inboxes. Waiting more than two weeks is probably not the best practice for most conference contacts, but that may be an appropriate amount of time if you’re following up with someone you have given your resume to.

Rule #10: Project Passion Explosion

Conferences are a slew of new ideas. You’re likely to be introduced to a whole bunch of new projects and interesting people. The best conferences are the ones where you feel like your brain is on fire with all the new projects you want to do. However, be reasonable about your time commitments. Don’t try to start more than one project after a convention. Wait a week or two and see if you’re still passionate about the project before you start on it. Unless it’s a time machine. Please start on that right away, because every conference goer needs one.

SCALE: Improving Diversity with Maslow’s hierarchy

If you’re reading this, I’ve just given my keynote at the Southern CAlifornia Linux Expo (SCALE). This post serves to link to all the different studies and resources I talked about, as well as my slides with notes and photo attributions can be found here.

Here’s the video of the keynote:

Introduction

In open source, we talk about meritocracy a lot. However, emphasizing meritocracy can actually lead to more bias against women:

It’s much better to actually acknowledge our biases and privilege. If you haven’t read it yet, Scalzi’s essay “White Straight Male is the Lowest Difficulty Setting” is an excellent starting point for exploring the impact of privilege.

There are lots of different ways individuals can contribute to improving diversity. However, this talk focuses on the macro view of how we as open source community individuals can increase diversity.

The inspiration for the structure of this talk came from Abraham Maslow’s paper “A theory of human motivation.”

Level 1: Geek Homeostatis, or Deep Hack Mode

Maslow talked about the needs that are required to keep the body’s chemical systems functioning (homeostatis). Those needs include warmth, food, water, and excretion.

Trans people often face harassment that keeps them from being able to use restrooms without fear. In response, an open source project called Refuge Restroom was created to map safe and gender-neutral restrooms. The project has also been featured in hack sessions by TransH4CK, an organization dedicated to developing open source projects that help trans*, gender non conforming, agender and non binary people.

What does homeostatis mean for a geek? I posit that it means deep hack mode, that magical time when you can pour everything into your project. But what is required in order to get into deep hack mode?

The first requirement is uninterrupted time. In open source, we expect people to volunteer their unpaid time to further the goals of our software. As Ashe Dryden explains, not everyone has the privilege to dedicate a lot of time to open source. Carers of young children and elderly relatives have very little time to spare. Women and especially women of color are more likely to be carers. Next time a candidate doesn’t have many github contributions, consider whether they’re a minority who may be a carer with little time, instead of someone who simply doesn’t want to contribute to open source.

There are some companies that are trying to help techie moms. The Paypal Recharge program provides job opportunities for women who have taken a break from their career (perhaps to raise a child) and want to switch into a technology career. Etsy is piloting providing executive coaching to new mothers. There’s also the non-profit Mother Coders, which helps women with children get into technology careers.

The next thing you need for deep hack mode is some sort of computer. Even with computer ownership increasing dramatically in the United States, the census data shows a deep disparity in who gets to own computers. African American and Hispanics, along with people in low and middle income brackets are far less likely to own a computer.

Women are also less likely to own a computer until all the men in the household have a computer. The book Women Don’t Ask talks about a series of interviews with computer science students at Carnegie Mellon University. They found that many female students didn’t start programming until college because their male siblings were granted more time on the computer or kept the computer in their room.

Even then, we have to consider what kind of computer minorities and lower class people are likely to buy, if they don’t buy a used computer. There are a whole bunch of different non-profits that are working to improve access to computers in low income communities around the globe. Free Geek operates in the United States (Portland and Chicago). Kids on Computers and Computer Reach gives computers internationally. The Raspberry Pi organization is also working to provide cheap computers globally. Why not donate your old computer, or donate money to refurbish old systems or make new cheap ones?

Of course, you need electricity to power your computer, and you need internet access to participate in open source communities. According to the 2011 Indian Census, only 67% of households had electricity. This Chrome Dev Summit talk on India’s internet growth was very enlightening. Most of India (19% or 248.53 million people) are on mobile networks, usually on a 2G network with an average speed of 60 KB/second. It costs them around 17 hours of minimum wage pay to have a 500 MB data plan. This means Indian internet users are very bandwidth conscientious. As community members of open source web tools and  services, we have an obligation to help lower our bandwidth footprint.

Level 2: Security

I talked at length about the Petrie multiplier, which proves that an attack on sexism is not an attack on men. I also talked about the requirements for an effective Code of Conduct, and how rolling your own code of conduct without listening to inputs is like rolling your own cryptography. Instead of making shit up and having it blow up in your face, you could pay women in tech who already have experience in improving diversity. I recommend contacting Ashe Dryden, Frame Shift Consulting, or Safety First PDX. *Edit: As of January 2017, I also offer diversity consulting through Otter Tech*

Level 5: Self Actualization

I mentioned a whole bunch of cool people in my final slides, and the diversity programs they work on:

There’s a lot of awesome projects that you can contribute to. If you don’t have time, I recommend donating to the Software Freedom Conservancy and Outreachy.

How to approach a new system: Linux graphics and Mesa

By now, most of the Linux world knows I’ve stopped working on the Linux kernel and I’m starting work on the Linux graphics stack, specifically on the userspace graphics project called Mesa.

What is Mesa?

Like the Linux kernel, Mesa falls into the “operating system plumbing” category. You don’t notice it until it breaks. Or clogs, slowing down the rest of the system. Or you need plumbing for your shiny new hot tub, only you’re missing some new essential feature, like hot water or tessellation shaders.

The most challenging and exciting part of working on systems “plumbing” projects is optimization, which requires a deep understanding of both the hardware limitations below you in the stack, and the needs of the software layers above you. So where does Mesa fit into the Linux graphics stack?

Mesa is the most basic part of the userspace graphics stack, sitting above the Linux kernel graphics driver that handles command submission to the hardware, and below 3D libraries like qt, kde, or game engines like Unity or Unreal. A game engine creates a specialized 3D program, called a shader, that conforms to a particular rev of a graphics spec (such as EGL 3.0 or GLES 3.1). Mesa takes that shader program and compiles it into graphics hardware commands specific to the system Mesa is running on.

What’s cool about Mesa?

The exciting thing for me is the potential for optimizing graphics around system hardware limitations. For example, you can optimize the compiler to generate less graphics commands. In theory, less commands means less for the hardware to execute, and thus better graphics performance. However, if each of those commands are really expensive to run on your graphics hardware, that optimization can actually end up hurting your performance.

This kind of work is fun for me, because I get to touch and learn about hardware, without actually writing Verilog or VHDL. I get to make hardware do interesting things, like add a new features that makes the latest Steam game actually render or add an optimization that improves the performance of a new open source Indie game.

Understand how much you don’t know

Without knowledge of both the hardware and software layers above, it’s impossible to evaluate what optimizations are useful to pursue. For example, the first time I heard modern Intel GPUs have a completely separate cache from the CPU, I asked two questions: “What uses that cache?” and “What happens when the cache is full?” The hardware Execution Units (EUs) that execute graphics commands use the cache to store metadata called URBs. My next question, on discovering that URB size could vary, and that newer hardware had an ever-increasing maximum URB size, was to ask, “How does the graphics stack pick which URB size to use?” Obviously, picking a smaller URB size means that more URBs can fit in the cache, which means it’s less likely that an EU will have to stall until there’s room in the cache for the URB it needs for the set of graphics commands its executing. Picking an URB size that was too small would mean programs that use a lot of metadata wouldn’t be able to run.

Mesa is used by a lot of different programs with different needs, and each may require different URB sizes. The hardware has to be programmed with the maximum URB size, and changing that requires stopping any executing commands in the graphics pipeline. So you can’t go changing the URB size on the fly every time a new 3D graphics program starts running, or you would risk stalling the whole graphics stack. Imagine your entire desktop system freezing every time you launched a new Steam game.

Asking questions helps you ramp faster

It’s my experience with other operating system components that lead me to ask questions of my more experienced graphics developer co-workers. I really appreciate working in a community where I know I can ask these kinds of basic questions without fear of backlash at a newcomer. I love working on a team that chats about tech (and non tech!) over lunch. I love the easy access of the Intel graphics and DRI irc channels, where people are willing to answer simple questions like “How do I build the documentation?” (Which turns out to be complex when you run into a bug in doxygen that causes an infinite loop and increasing memory consumption until a less-than-capable build box starts to freeze under memory pressure. Imagine what would have happened if the experienced devs assumed I was a n00b and ignored me?)

My experience with other complex systems makes me understand that the deep, interesting problems can’t be approached without a long ramp up period and lots of smaller patches to gain understanding of the system. I do chafe a bit as I write those patches, knowing the interesting problems are out there, but I know I have to walk before I start running. In the meantime, I find joy in making blog posts about what I’m learning about the graphics pipeline, and I hope we can walk together.

Installing Debian on ASUS UX301LA

I ran into some issues with installing Debian on my new Hawell ASUS zenbook laptop. I’m documenting it on my blog to try and ease anyone else’s struggles.

I used the Debian CD image instead of the netinstall. I accidentally installed Debian stable, but later added apt sources to use Debian testing. I used the 20140712 Wheezy amd64 install ISO on a USB 3.0 flash drive.  The drive was plugged into the right side, but I doubt that makes a difference.

Step 1: Reconfigure the BIOS boot options.

Plug in the USB drive, and boot the laptop while pressing F2 to go into the BIOS.  Go into the boot menu, secure boot menu, and disable secure boot.  Go back to the boot menu and enable CSM. Change the boot order so that the USB UEFI boot option is first (before the Windows boot option).  Save, unplug the USB drive, exit BIOS, and boot into Windows.

Step 2: Repartition drives in Windows.

Hit Windows key, type ‘disk’ and click the partitioner.  I had the laptop version with two 256GB drives with software raid, which showed up as a 256GB drive D:/ and a 200GB drive C:/.  I deleted drive D:/, and shrunk drive C:/ as much as the partitioner would allow (which still left 60GB free for Windows to use for my Steam games that don’t have Linux support yet).

Step 3: Go through some of the Debian installer process.

Start the Debian installer. Ignore that it can’t find our network device, pick a host name and add root and normal users.  Choose ‘Manual’ when it comes to partitioning disks.  You’ll see the software raid partition looks like this:

Step 4: Fix the EFI partition.  Select the fat32 EFI system partition, and change ‘Use as’ to ‘EFI boot partition’.

Step 5: Add a new Linux partition.

Choose ‘Automatically partition the free space’ and choose ‘All files in one partition’.  Once the partitions are created, select the ext4 root partition (‘/’) and (optionally) change the mount options to include relatime.  This means that file timestamps aren’t updated automatically, which means less disk writes to the SSDs, thus increasing the lifetime of the disks. If you like, set a label for the root partition so you can see it in Windows later.  After you’re done, the partition disks screen should look like this, and you can hit ‘Finish partitioning and write changes to disk’:

Step 6: Go further in the Debian install process.

Don’t use a network mirror. Pick whether you want to send installed package information to Debian or not. Select Debian desktop and system utilities and continue.

Step 7: Fix grub install failure.

Jamey Sharp figured this out, thanks for his help!  It seems that the standard grub installer was confused by the “Intel Matrix Storage Manager” or IMSM, that’s firmware for booting to RAID setups.  Basically, the BIOS knew about the RAID setup, Linux (mdadm and the kernel) knew about IMSM, but grub didn’t. Grub didn’t know the BIOS used IMSM and could boot from the disk, so grub didn’t think the hard drive was bootable.  Silly grub!

Go to a shell by pressing CTRL+ALT+F2.  Type this command:

df /target

Look at the output of that command.  It will list the file system mount that corresponds to /target (the mount point of the root file system where Debian installs to).  It should look something like /dev/md126p6.  The ‘p6’ is one particular partition on the RAID array, but we want grub to use the whole disk, so we strip off the partition designation for the next couple of commands.  Type this command:

cat > /target/boot/grub/device.map

and then type:

(hd0) /dev/md126

and hit CTRL+d to stop writing to the file.  Then go back to the installer (in the text installer, that’s ATL+F1, but it’s ALT+F5 in the graphical installer).  Hit ‘continue’ and ‘continue’ again to go back to the Debian installer main menu.  Again, hit enter on the ‘Install grub bootloader on the hard disk’.  The installation should complete successfully.

Step 8: Add grub UEFI boot option.

Unplug the USB key, and hit F2 to go back into the BIOS.  The Debian installer didn’t create a UEFI boot option for the grub installation, so we have to make one manually.  Go into the boot menu, and hit ‘Add New Boot Option’ and then ‘Add boot option’.  Pick a name for it (‘GRUB’). Under ‘Path for boot option’, there should only be one choice of filesystem, which starts with PCI. Under ‘Select a file to boot’ choose EFI and then debian and finally grubx64.efi.  Choose ‘Create’ and you’re done adding the boot option.  Hit ‘escape’ to get back to the boot menu.  You’ll need to change the boot option priorities to make grub the first boot option (which means you’ll need to go into the BIOS and change it back should you want to boot into Windows).  Save and exit the BIOS.

Step 9: Update your packages and install Intel wireless firmware.

Debian stable (which is running a 3.2 kernel) will boot into GNOME 3 compatitbility mode because it doesn’t have kernel or mesa support ffor the Haswell Intel graphics.  The kernel also doesn’t recognize the wireless PCI device.  You’ll have to use the USB network adapter and plug into an ethernet cable.

Add the Debian stable sources by editing /etc/apt/sources.list so that it says:

deb http://security.debian.org/ jessie/updates main contrib non-free
deb http://ftp.us.debian.org/debian/ jessie main contrib non-free

You may want to use a different local mirror closer to you.

Run `aptitude` as root, and mark all packages that are upgradable. Mark the firmware-iwlwifi package for installation. And install all your new packages from Debian testing!

After a reboot, both wifi and graphics should be working correctly.

The Gentle Art of Patch Review

As the next round of the FOSS Outreach Program for Women (OPW) approaches, my mind turns to mentorship, and lessons learned when dealing with newcomers to open source projects.  Many open source contributors have been in the FOSS community for long enough to forget how painful their first experience contributing to a project was.  As the coordinator for the Linux kernel OPW internships, I get to help newcomers go through that experience every six months.  I’ve learned a lot about how we, as open source reviewers, maintainers, and mentors, can help newcomers during their first contributions, and I’d like to share some of the perspective I’ve gained from OPW.

The Newcomer’s Perspective

As a newcomer, you’ll come at the project with enthusiasm and determination to do your best to make a really good first contribution.  You’ll try to find all the documentation for the project you’re working on, and read through it, only to realize it’s completely outdated and incomplete.  You’ll ping mentors and ask questions, but you may not be able to reach the right person to answer your question.  So you do the best you can with the resources you find, cross your fingers, and submit your first contribution.

It’s common for newcomers to blame themselves when they make mistakes in their first contributions.  You’ll cringe, wring your hands, smack your forehead, or maybe even put your head in your hands.  Then you’ll sigh and try again.  No matter how good the documentation for contributing to the project is, how meticulous you are, you will slip up at some point.  And that’s fine, because you are going through a process of learning something new, and expanding your skills.  The most productive contributors see each mistake they make as a growth opportunity, instead of a personal failure.

The Maintainer’s Perspective

As a long-standing open source contributor, you may get contributions from newcomers all the time.  You’ll see several of them make the same mistakes over and over again, and if you have enough time, you’ll update your project documentation to help people avoid those mistakes.  Often you don’t have time, and the documentation doesn’t get updated.  Or you’ll think that something is so blindingly obvious that everyone should understand it, without realizing how much specialized experience you need to have that knowledge.

At some point in as a maintainer, you will be completely overloaded with contributions from both newcomers and familiar, trusted contributors.  It’s easy to review those contributions from long-standing contributors, because they know your expectations and the rules around contributing.  You trust them to write solid code containing very few bugs.  So you review the contributions from trusted contributors, and put off reviewing contributions from newcomers until you have a large block of time to thoroughly review the newcomer’s contribution.

It’s tempting to just go through the newcomer’s contribution from start to finish, commenting on every single thing they missed.  The maintainer’s mindset is, “Ok, I have time, I should share my knowledge with this person who is obviously missing some tribal knowledge they need to contribute to my project.”  From the newcomer’s perspective, what they experience is their contribution being ignored for days or even weeks, followed by a very long email full of nit-picky comments on coding style, criticism of their code structure, and even comments about their spelling and grammar.  Even if the review is fair and neutrally worded with a focus on their technical mistakes, it still feels very harsh.

We Can Do Better

How can we make this process better on both sides?  How can we make the first patch review less harsh, and still respect the maintainer’s valuable time?  Can we make turn around time on first patch review even shorter?  When I was the xHCI driver maintainer, I started experimenting with a different way of reviewing contributions from newcomers that I think might help address all three of these issues.

The Three-Phase Contribution Review

Instead of putting off reviewing first-time contributions and thoroughly reviewing everything in the contribution at once, I propose a three-phase review process for maintainers:

  1. Is the idea behind the contribution sound?
  2. Is the contribution architected correctly?
  3. Is the contribution polished?

You can compare these contribution review phases to the phases of building a new house or taking on a remodeling project.  The first phase is a simple yes or no on the architectural diagram, the big idea of the contribution.  The second phase is getting all the structural issues correct and making sure the plumbing and electrical all connect properly.  The third phase is making everything polished, sanding off the rough corners, and slapping on a coat of paint to match whatever color the bike shed is currently painted.

Phase One: Good or Bad Idea?

The first phase of the contribution review should only require a simple yes or no answer from the maintainer: “Is this contribution a good idea?”  If the contribution isn’t useful or it’s a bad idea, it isn’t worth reviewing further.  The best action in this case is to refocus the newcomer on a better idea or a completely different area they could work on.  Or open a discussion with the newcomer and other contributors as to what should be done to address the issue in a different way.

If the contribution is worthwhile, but you don’t have time to go onto the second phase of patch review, do NOT say nothing.  Instead, drop the contributor an email that says, “Thanks for this contribution!  I like the concept of this patch, but I don’t have time to thoroughly review it right now.  Ping me if I haven’t reviewed it in a week.”  This builds the newcomer up by expressing appreciation for the time and effort they put into creating this contribution, and lets them know they’re on the right path.  It also gives you incentive to actually move onto phase two, because the contributor will bug you again if you haven’t reviewed the contribution.

Phase Two: Is this Architecturally Sound?

In phase two, you review the contribution to see whether the code (and only the code) is architecturally correct.  Focus on whether the code is sound at an architectural level. Is the code behavior correct?  Are they modifying the right functions, or does the code need to be moved around?  Have they structured their build files correctly?  Do they need to refactor any code?  Do they need to get buy-in on the code structure from other maintainers?  Are there potential hazards or tricky parts of the code that the everyone needs to review carefully?

You will need to squash the nit-picky, perfectionist part of yourself that wants to comment on every single grammar mistake or code style issue.  Instead, only include a sentence or two with a pointer to coding style documentation, or any tools they will need to run their contribution through.  If their patch needs to be updated against a newer version of your project, or a different maintainer’s upstream repository, point that out.  Avoid nit-picking every instance where they violate your project’s contribution style rules. Your eyeballs may be bleeding from the number of camel case variable names or variables names that use variable type encoding, but take a deep breath and ignore that.  Let them explore the tools, documentation, and fix (most) of their mistakes on their own.

Double check and make sure the documentation and tools actually document the mistakes you see in the code, and if they don’t, update them.  Your documentation and tools should clearly spell out the format of a valid contribution, and if they don’t, you need to address that technical documentation debt.  If you don’t have time to address that technical documentation debt, tell the contributor what needs to be fixed, and see if they have the time to address it.  Don’t be silent just because you don’t have time to fix it.

Phase Three: Is the Contribution Polished?

From a newcomer’s perspective, after phase two is complete, they’re hooked on getting their contribution in.  You’ve worked with them on an architectural level, and they know you want to accept their contribution.  They’re emotionally invested in getting their contribution into your project, and they’ve learned a lot by going through a couple contribution revisions.  Thank the contributor for being patient this far and remind them that you’re willing to accept the contribution, but they need to clean up a few small things first.

Now is the time for phase three: the polishing phase.  In this phase, you finally get to comment on the meta (non-code) parts of the contribution.  Correct any spelling or grammar mistakes, suggest clearer wording for comments, and ask for any updated documentation for the code.  It doesn’t make sense to create documentation for the code until the code is structurally sound, which is why the documentation phase comes last.  You may also need to encourage them to write a better commit message, mark the patch to be back ported to stable versions of your software, or Cc the right maintainers.

As a newcomer, this third and final phase can be more painful than the architectural critiques in the second phase.  Many young programmers lean towards science, math, and technology because they feel like they don’t excel in writing or people skills.  Contributors may also be writing in a language that is not their native tongue.  That’s why this nit-picky phase comes last, so that the contributors get over their embarrassment after they’re emotionally invested in getting their patches into your project. Be gentle, patient, and compassionate.  As a maintainer, you may suggest comments or patch descriptions that you hope the contributor simply copy-pastes into their patch.  You may have to just edit the patch description yourself.

How Does This Benefit Maintainers?

I’ve found that this three-phase contribution review process saves me (as a maintainer) a lot of mental stress.  The first phase is a simple yes or no question (“Is this a good or bad idea?”), which means I don’t procrastinate on reviewing first time contributions.  Being up front with contributors about not having time to review their contribution can initially feel like shirking duties, but I feel a mental load lifting when I get over that and simply say something like, “Hey, this patch looks like a good idea, but I don’t have time to review it right now. I’m heading to a conference next week, and need to work on my slides.  Can you ping me in two weeks if I haven’t reviewed your code?”

If you’re honest with contributors about your time commitments, they know their contribution is wanted, and they can pass your time commitments onto their boss or program manager.  Also, if you find yourself delaying contribution review often, it may be a sign you need a co-maintainer or you need to ask other contributors to do more code review.

The absolute worst thing you can do during phase one is be completely silent.  The newcomer doesn’t know whether their contribution is a good or bad idea, and any discussion that needs to happen with other maintainers to modify the fundamental concept never happens.  That’s why phase one is a simple yes or no answer, in order to get the code review ball rolling.

I’ve also heard some maintainers state that they want to dump all their review into phase two.  They have precious little time, and they fear they will forget specific feedback if they break code review into several phases.  I will often notice nit-picky coding style issues during my architectural review, and I will make a note to myself to nip that pattern in the bud in phase three.  Keeping a dated text file per patchset or even replying to the patch but only adding your own email address in the To field will help you keep track of the issues that need to get addressed in phase three.

Often by the time you get past the architectural discussion in phase two, you’ll find many of your initial nit-picky criticisms were addressed.  A conscientious contributor will look at the documentation and tools you point out in phase two, and will address most of them in their next revisions.  What will be left for the third (polishing) phase is mistakes made because of undocumented tribal knowledge, or rules that are undocumented because they differ from maintainer to maintainer within the project.

Try It Out!

The following three-phase contribution review process should help both maintainers and newcomers:

  1. Is the idea behind the contribution sound?
  2. Is the contribution architected correctly?
  3. Is the contribution polished?

Maintainers will be able to respond more quickly to contribution review if they focus on just answering one question during the first phase of review: “Is this a good or bad idea?”  Newcomers will be encouraged by a timely email that states whether the basic concept of their patch is sound.  Both the maintainer and the contributor benefit from splitting the actual code review into an architectural discussion, followed by a polishing phase.  Maintainers will save themselves time if they simply point out documentation and tools contributors should use to ensure their contribution is up to community standards, and the nit-picky polishing phase is saved for after the newcomer is emotionally invested in getting their contribution into your project.

I think this process should both save maintainers time, and decrease the bounce rate for newcomers, so I encourage you to try it out!

2014 Kernel Internship Report (OPW)

For the past year and a half, the Linux kernel has participated as a project under the FOSS Outreach Program for Women (OPW). OPW provides a three month paid internship for women (cis and trans) and genderqueer or genderfluid people. After a month-long application process, the selected OPW interns are paired with an open source mentor to work on a project. As of August 2014, there are eleven Linux kernel OPW alumni, and five interns that are just finishing up their internships.

The results from the past three OPW rounds are stunning:

  • 1,092 patches accepted into the Linux kernel from OPW alumni and interns
  • Lines of code added and deleted: +32,327, -193,938
  • OPW was a top contributor for the 3.11, 3.12, 3.13, and 3.14 kernels

The sheer number of patches the OPW kernel interns and alumni have created is impressive. They’ve been in the LWN top kernel contributor statistics since the program started in the 3.11 kernel, and they continue to be a top contributor despite the lack of published data for the 3.15 and 3.16 kernels. Making it over the thousand patch mark is a cause to celebrate.  More importantly, the OPW kernel interns and alumni have deleted six times more code than they added. They’re deleting dead code and unused drivers, and thus removing bugs from the Linux kernel.

The statistics from the code development efforts from the OPW kernel interns and alumni are impressive. However, contributing to open source isn’t just about writing code. It’s about interacting on mailing lists, reviewing code, writing documentation, answering questions, working on graphical design, maintaining project websites, and so much more.

The main goal of the OPW internship program is to create a long-term relationship between the mentee, the mentor, and their open source community, in order encourage minorities to continue to contribute to open source. How are we progressing towards the goal of creating more women kernel developers? Are the women who complete OPW kernel internships continuing to work on open source projects after their internship ends? Do they find jobs where they can be paid to work on open source?

In order to measure this, I created a longitudinal study to measure open source contributions of OPW alumni. I’ll send out the survey every 6 to 12 months, and compare the results of the program over time. The most recent survey results from our eleven Linux Kernel OPW alumni shows the program is successful at encouraging women to continue to participate in open source.

Graph of the monthly FOSS contributions from OPW kernel alumni

At least monthly, OPW alumni are engaging and contributing to open source communities. Most of them participate through code submission, testing, and discussion on mailing lists, IRC, or forums. However, it’s interesting to note that a few of the OPW alumni have stepped into open source leadership positions, either by reviewing contributions, maintaining a project, or by managing a team of open source contributors.

Another exciting result of OPW is that some of the kernel OPW alumni are getting paid to work as Linux Kernel developers. Teodora Băluţă is working on Android kernel drivers for Intel’s Open Source Technology Center. Lisa Nguyen is working for Linaro on ARM power management. Lidza Louina is a kernel developer at Oracle.  Xenia Ragiadakou also works on Linux kernel power tuning at OnApp. Elena Ufimtseva isn’t being paid to work on the Linux kernel, but she is working on a proprietary project at Citrix.

I’m overjoyed that these women have found jobs in the technology sector, and so many of them are paid to work as Linux kernel developers. This fact is heartening to me because some of the women that participated in OPW were working in retail before their internship. To be able to move into the technology sector or be hired as a Linux kernel developer is a giant step in the right direction, and I’m happy that the OPW program could be a part of that.

It’s exciting to see five of the eleven OPW kernel alumni get jobs in the technology sector. Four of the kernel OPW kernel alumni are still working their way through Bachelor’s or Master’s degrees. Two OPW kernel alumni are actively looking for jobs. If you need to hire a junior kernel developer, please email the opening to sarah dot a dot sharp at intel dot com, and I will pass the job description onto our OPW alumni.

I will continue to coordinate the Linux kernel mentors and interns under the FOSS Outreach Program for Women (OPW).  The next internship period will run from December 9, 2014 to March 9, 2015.  Applications for the next round open September 8th, and the Linux kernel contributions will be due October 31, 2014.  (Most OPW projects have a deadline of October 22, but the kernel project application process will be on hiatus from October 10 to 20 because many mentors will be attending LinuxCon Europe, Embedded Linux Conference Europe, and Linux Plumbers Conference.  Apply and get your kernel patches in early!)

If you’re interested in applying to be an OPW intern, you can find more information on how to apply on the OPW homepage, and on the OPW kernel project page.  Please note that you do not have to be a student to apply to OPW.  The only requirement is that you’re able to work full-time during the internship period, and that you are a woman (cis or trans), or a genderqueer or genderfluid individual.  This round, we’re also running a pilot to explore opening up the project to other under-represented minorities in tech, by allowing alumni from the Ascend Project to apply.  If the pilot is successful, we’ll be able to expand OPW to encourage chronically underemployed, LGBTQ, Latin@, and African American populations to participate in open source.

[Update 08/26: Fixed this post to note that both Lidza and Xenia are being paid to work as Linux kernel developers.]

Onwards to my next adventure!

I’m joining the Intel OTC ChromeOS differentiation team, and transitioning maintainership of the xHCI driver over to Mathias Nyman.

I’ve only been officially on the team for a couple of weeks, but I’m already playing with webGL tutorials and learning about vertices, shaders, EGL extensions, piglet tests, and loads more about graphics.  It’s been really great working with Josh Triplett and Chad Versace. I managed to join the team in time to attend their group quarterly event at Ground Kontrol.  We played pinball, 80’s games, and DDR for hours. 🙂

Linux Kernel Internships (OPW) Update

A month ago, Amanda McPherson and Greg Kroah-Hartman from the Linux Foundation asked me to coordinate an internship program aimed at getting more women to participate in the Linux kernel. In order to be considered for an internship, the applicants need to submit patches to the Linux kernel, and get them accepted.

The results have been amazing:

  • 41 women applied for 6 Linux kernel internships.
  • In 13 days, 374 patches were submitted, and 137 patches were accepted.
  • Diff stat for accepted patches:
    105 files changed, 3889 insertions(+), 4872 deletions(-)

Read More

Patchsets for Dinner

Oh, I just came up with a really good metaphor for how to create a good looking patchset:

A patch should be one logical change. For example, you should put all whitespace changes in one patch. If you’re changing variable names to avoid CamelCase, you should do only one variable name change per patch. Basically, you’re breaking up patches into the smallest logical unit necessary, in order to make it easy to read and review. A patch that’s over a hundred lines is going to be pretty hard to review.

Think of it this way: you’re preparing a big meal for a friend, and you have many different dishes you want to serve them. You don’t throw all the food into one big pot and serve it to them. Instead, you serve each part of the meal on separate plates, so that they can admire your cooking, and you take the time to explain how you prepared each dish, and why it’s tasty.

A good patchset is like a well-prepared meal. You provide a menu (cover letter or patch zero) that explains what you’re going to serve (what the overall goal of the patchset is), and bite-sized portions (one logical change per patch) beautifully arranged (documented, signed, and up to coding style) in a particular order (numbered patches, with bug fixes and refactoring first).

It takes a while to learn how to cook a full course meal, and even longer to figure out how to present it with a flourish. People new to Linux kernel development should work on sending bite-sized, smaller patches, with one logical change per patch. Once you’ve got that down, you can work on presentation of multiple patches.

Linux Kernel Internships for Women

Want a summer internship working on the Linux kernel?

Internships are available for women and genderqueer/genderfluid people for summer 2013, from June to September. They come with a $5,000 stipend.

We have some pretty awesome projects and helpful mentors, so please apply to the FOSS Outreach for Women (OPW) page.

Please complete your initial application by May 1st. We’re still working on some details, so you’ll be able to update your application until May 17th.

Please share this with any of your friends that might be interested!

Update: If you’re interested in being a mentor for kernel interns in any capacity, or helping review applications or documentations, please let me know. My email is in MAINTAINERS.